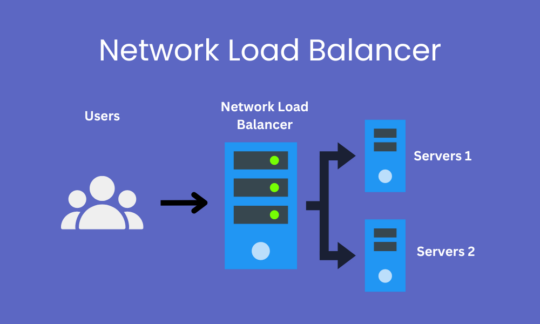
Network Load Balancer (NLB)
Purpose:
- Operates at Layer 4 (Transport Layer), directing traffic based on IP and TCP/UDP protocols.
- Designed for high-performance scenarios like real-time applications (gaming, financial transactions).
Key Features:
- Lower Latency than Application Load Balancers (ALBs).
- Supports protocols: TCP, UDP, and TLS.
- Use cases: Where speed, throughput, or raw transport routing is required.
Practical Steps to Use NLB:
- Create Target Group:
- Target Type: Instance.
- Protocol: TCP (Port 80 for HTTP or another service).
- Create Load Balancer:
- Select Network Load Balancer.
- Attach the Target Group.
- Test with DNS Name:
- Use the NLB DNS endpoint to test.
- Example:
http://<your-nlb-dns-name>in the browser or withcurl.
Auto Scaling
Why Auto Scaling is Needed:
- To maintain optimal performance during demand spikes and save costs during idle periods.
- Automatically scales the number of instances up or down based on pre-defined policies.
Scenario Example:
Case 1: High Traffic
- Initial Setup: 2 Instances.
- During a flash sale, traffic increases by 300%. Auto Scaling triggers and adds 3 more instances to handle the load.
Case 2: Low Traffic
- Late at night, user traffic decreases to 10%. Auto Scaling scales down to 1 instance to reduce costs.
Scaling Types:
- Horizontal Scaling:
- Adding or removing instances.
- Example: From 2 to 5 EC2 instances.
- Vertical Scaling:
- Increasing or decreasing the instance size.
- Example: From t2.micro to t2.large.
Launch Templates:
Templates define configuration for EC2 instances.
Key Elements:
- AMI (Amazon Machine Image).
- Instance Type (e.g., t2.micro).
- Nginx Configuration:
- Add a startup script in the User Data section:
#!/bin/bash
apt update -y
apt install nginx -y
echo "<h1>Welcome to Auto-Scaled NLB Setup</h1>" > /var/www/html/index.html
systemctl restart nginx
Auto Scaling Group Setup:
- Create Auto Scaling Group:
- Choose Launch Template.
- Set Min, Max, Desired Capacity:Min: 1 (Minimum active instances).
- Max: 5 (Maximum allowable instances).
- Desired: 2 (Starts with 2 instances).
- Attach to Load Balancer:
- Associate the Auto Scaling group with an NLB or ALB.
- Test:
- Access the NLB DNS endpoint and observe scaling behavior during traffic spikes or drops.
Scaling Policies:
- Scheduled Actions:
- Pre-defined scaling at specific times.
- Example: Scale up to 5 instances during peak hours (9 AM - 5 PM).
- Dynamic Scaling:
- Based on metrics like CPU Utilization or Network Traffic.
- Example: Add 1 instance when CPU utilization > 70%.
- Step Scaling:
- Adds/removes instances in steps based on metrics.
Cooling Period:
- Time to wait before executing another scaling action (prevents rapid scaling fluctuations).
Hibernate vs. Stop vs. Shutdown
- Hibernate:Pauses the instance and saves the RAM state for a quick resume.
- Stop:Stops the instance, data on EBS persists but RAM data is cleared.
- Shutdown:Terminates the instance, clearing everything unless explicitly backed up.
Summary of Key Topics:
- NLB: Best for fast, lightweight, and transport-layer routing.
- ALB: Better for HTTP-based application routing (Layer 7).
- Auto Scaling: Automates instance scaling based on load.
- Launch Templates: Central configuration for scalable and repeatable EC2 setups.
- Scaling Policies: Schedule, dynamic, or step-based with cooling periods.
- Practical Setup: Attach instances or scaling groups to Load Balancers for efficient traffic management.
This workflow ensures a robust, scalable, and cost-effective infrastructure while adapting dynamically to changing traffic.
Additional Topics to Consider
Health Checks in Auto Scaling and Load Balancers
- Importance:
- Ensures that unhealthy instances are replaced automatically to maintain high availability.
- How to Configure:
- Define health check paths or ports for HTTP/TCP-based checks.
- Example:
/healthendpoint for ALB or TCP:80 for NLB. - Set the interval, timeout, and healthy/unhealthy thresholds appropriately.
Auto Scaling Use Cases
- E-commerce Websites:
- High traffic during sales and festivals.
- Auto Scaling prevents downtime during spikes.
- On-Demand Services:
- Ride-sharing apps scaling up during rush hours.
- Startups:
- Optimizing cost by scaling down resources during non-peak hours.
Elastic Load Balancer Comparison
- NLB vs. ALB vs. Classic Load Balancer:NLB: Low latency, high throughput, handles TCP/UDP.
- ALB: Advanced routing, Layer 7 features like path-based or host-based routing.
- Classic LB: Legacy, both Layer 4 and Layer 7 (limited features).
Spot Instances in Auto Scaling
- What are Spot Instances?Low-cost EC2 instances with spare AWS capacity.
- Use in Auto Scaling:Include spot instances in your Auto Scaling Group to save costs during non-critical operations.
Elasticity vs. Scalability
- Scalability:
- Ability to handle increasing load by adding resources.
- Example: Adding more EC2 instances.
- Elasticity:
- Dynamically adjusting resources based on real-time demand.
- Example: Auto Scaling scaling up and down automatically.
Monitoring and Metrics
- Use CloudWatch for:
- Monitoring instance performance (CPU, memory, network).
- Setting up alarms to trigger scaling policies.
Cooldown Period Best Practices
- Use a short cooldown period for rapid fluctuations.
- For steady traffic, keep a longer cooldown to avoid unnecessary scaling events.
Lifecycle Hooks in Auto Scaling
- Purpose: Perform actions during instance launch/termination.
- Example:
- Notify a service when an instance is added/removed.
- Backup data before terminating an instance.
Enhanced Practical Setup
- Dynamic Scaling with CloudWatch Metrics:
- Set a target for CPU utilization (e.g., 50%).
- Auto Scaling adjusts instances to maintain this target.
- Attach IAM Role to Auto Scaling Instances:
- Grant instances access to specific AWS resources (e.g., S3, DynamoDB).
